You are here: Building the Model: General Elements > Tanks > The Tank Submodel
In order to function properly, all tank models should include the tank submodel (TANKSUB.MOD). The tank submodel contains important subroutines and data elements (arrays and macros) used to simplify tank modeling. Each of these subroutines and data elements has a "Tank_" prefix to help identify it and to prevent any accidental name duplication.
Please note
All user-defined model elements should begin with something other than "Tank_".
1. Select the gauge/tank symbol from the Location Graphics window.
2. Click on the layout window where you wish to place the tank and select Create Tank Location from the menu that appears. ProModel places the tank on the layout.
Please note
When you create the first tank in your model, ProModel will display a dialog that allows you to automatically import various subroutines, arrays, macros, and library graphics specific to tanks. If you do not wish to include these new items, you may cancel the action.
3. Enter a capacity (1 to 999999) for the tank in the location capacity field.
4. Define and reference any necessary tank control subroutines.
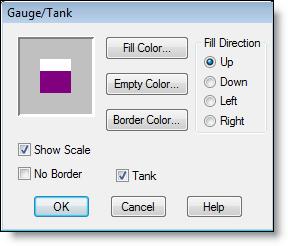
1. Double click on the tank or gauge (or right click and select Edit Graphic).
2. From the dialog that appears, make the appropriate changes.
3. Click OK.
How to change between a tank and a gauge
• Double click on the tank or gauge and check or uncheck the tank option.
or...
• Right click on the tank or gauge and select Change Tank to Gauge or Change Gauge to Tank.
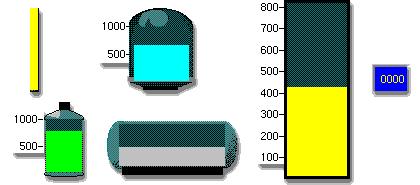
In addition to defining a tank graphic, you may add labels and other figures to a tank. For example, you can add a counter to digitally display the fill level of the tank (ProModel rounds the value displayed to the nearest integer). The following are examples of how you can use tanks in ProModel.